Monday, March 10, 2014

Thank You Postcard

A personalized thank you note that your guests will absolutely LOVE and can hang on the refrigerator for months!  

Front of Thank You Postcard
 The first step to the thank you postcard is buying the wooden letters, paint, paintbrush, and ribbon from Michael's or AC Moore.  Don't forget these stores always have coupons, so wait until you get a good one to buy the supplies! I chose light blue paint because our wedding colors were blue, white and silver. I also knew the blue would be a good contrast against my dress and Matt's tux.  Think about which of your wedding colors would look best, and if you are indecisive.... go with white! Once the letters are painted and have dried you can use super glue or a staple gun to attach them to the ribbon.  Each letter should be about 1 inch apart.  Leave about 1-2 feet at the end of the Thank You so you and your hubby can hold it easily during pictures.  This project is similar to the DIY Wooden Letters.

Once the project is complete, Add it to your list of things to bring with you on your wedding day.  I left them at the front door of my parents house (where we got ready). When we were leaving for the church, I grabbed them and had them in the limo, ready to use after the ceremony.

I had given my photographer David a heads up that we were going to be doing this.  Giving your photographer a heads up of any special pictures you want taken is a good idea for a couple reasons.  One, so you have another person to remember to take these pictures.  Two, they can help you figure out a good background for the pictures.  

David was so gracious and gave us the picture earlier than the other pictures so we could order them. Remember you want to get your Thank You notes in the mail as soon as possible (2-6 weeks after your wedding day.)

So I had the front of the postcard, but was unsure of what to do for the back.  I went to google and searched "back of postcard" and found a blank picture of the back of a postcard. I saved it to my computer to use. 
Back of Thank You Postcard

I had never made or ordered postcards before so I didn't know what company to use.  Once again, google came to my rescue (love their searches!)  I googled "print postcards" and tons of companies came up. I believe I used Vistaprint.com. It was super easy. I uploaded the picture of us with the thank you banner and the postcard back picture. Then went through their simple ordering process.  They were shipped within 2 weeks.  During those 2 weeks, I made sure to pick up fun stamps at the post office. 
Send Thank You Notes out within 2-6 weeks

Hope you go the personalized thank you note route, guests really do love them!!

What to do with your flowers, decorations, extra cake when the wedding is over

As a bride, you can spend endless hours creating your perfect wedding.  From planning the flower arrangements with your florist, to watering ivy twice a week for 10+ weeks leading up until the wedding, to choosing the perfect cake flavor.  After all of your hard work has gone into these small details that add up to your perfect day, you have one more thing to take care of. 

Where will the extra stuff go when the day is over?

At the end of the wedding, you don't want to be stuck with 10 flower arrangements. Most couples take a honeymoon, so why have 10 flower arrangements die in your apartment, while you are soaking in the sun in the Caribbean?  Give the flower arrangements away!! It can be hard to choose which 10 people will get the centerpiece/arrangement, so set it up in a way that won't hurt anyone's feelings.  Have the DJ announce towards the end of the reception that the person who traveled the farthest at the table gets the centerpiece.  

We also had 8 ivy pots from our church (that also were at the reception; my Aunt's brought them over after the ceremony).  My grandma asked to take one back to her house and I couldn't say no! My favorite part about giving these away are seeing them when I visit people's houses. Recently my parents visited my grandma. My mom called me to tell me the ivy pot is still going strong and my grandma loves showing people so she can say it's from her granddaughters wedding!  Sure puts a huge smile on my face. Share the love. Here is the link to the DIY Ivy Pot

If you choose to leave your flower arrangement at the church, you can coordinate to have the program the next day say "dedicated to so and so church in honor of the newly weds!"


Just remember people love fresh flowers, so it won't be hard to coordinate this, just don't forget this detail while planning!


Saturday, January 4, 2014

60 Pictures to take on your Wedding Day

Your wedding day is one of the most special days in your life.  You want every detail, every special moment, and every special person that took part in your wedding captured so you can look at your wedding album, and remember it perfectly.  Here is a list of 60 pictures that my photographer captured. Hopefully this helps you prepare for your big day.  Look it over, print the checklist at the bottom, and bring it with you when you meet with your photographer.

1.     Bride's Bouquet/Bridesmaids Bouquets
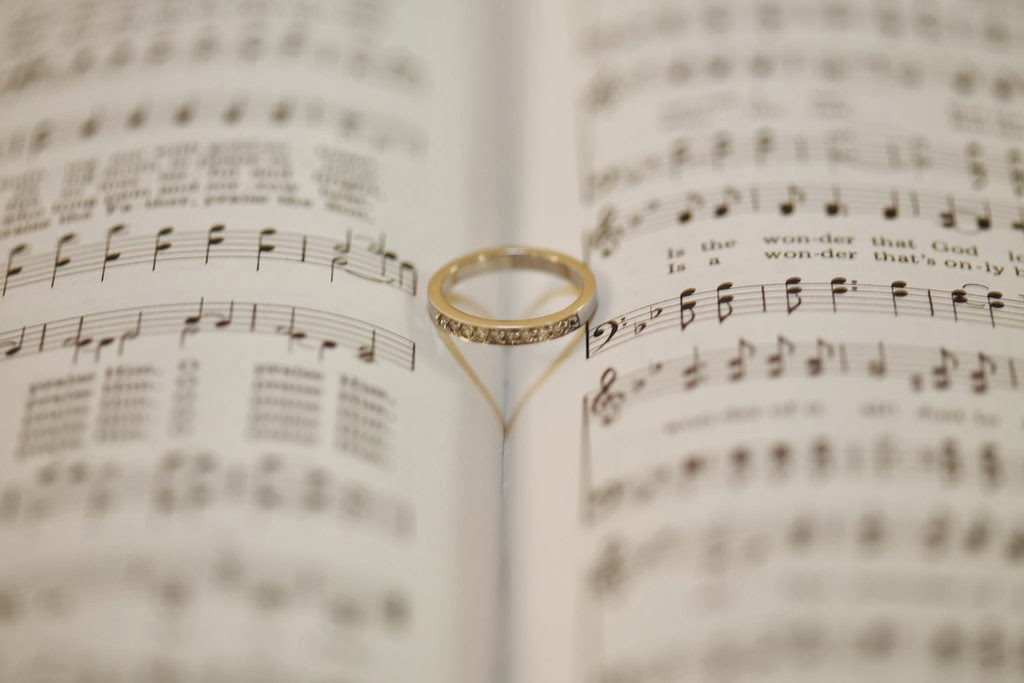
Wedding Band on open hymnal
2.       Bride's Shoes and Jewelry
3.       The Rings
4.       Bride and Bridesmaids with their hair and make-up done before you get into their dresses
5.       Bride getting ready- putting on your dress, shoes and jewelry on
6.       Groom and groomsmen getting ready
7.       Having fun with your bridesmaids using a mirror.  
We bought a nice mirror at Marshall's Home Goods, used it for pictures, and returned it (guess it didn't go with our home decor ;-) )
8.       With your siblings at your parents house. 
We climbed up onto the big rock we played on growing up. Talk about memories!
9.       Getting into the limo.
10.   Girls in the limo on the way to the ceremony.
11.   Walking into the church
The Best Man covering the Groom's eyes while the Bride enters the Church!!
When we pulled up to the church the limo driver pulled up to the side door. I'm not sure how we forgot to let Matt know to stay clear of the hallway near the parlor 20 minutes before the ceremony, but we did..We walked up to the church, opened the side door, walked in, and there is Matt and his brother putting on their boutonnieres!  Without even thinking my famous last words before getting married to Matt were "douchebag!" The groom should not see the bride before the ceremony! Matt's brother quickly covered his eyes with our Marriage License.
12.   Bridesmaids in the parlor
13.   Bride and her parents in parlor
14.   Bride with her Dad before walking down the aisle
15.   The church (all decorated, before guests there)
16.   Pastor leading the ceremony
17.   Readers
18.   Singers/Piano player
19.   Saying Vows/Putting on the rings
Have to capture the first kiss as husband & wife!!

20.   The Kiss
The Bride's parents reaction is priceless!

21.   The guests reaction/crowd during ceremony
22.   The couple after the vows leaving the ceremony
Artsy Picture of Bride and Groom (could be cool to print on a canvas and hang in your house)
23.   The send off after the ceremony
24.   Formal shot of Bride and Groom with the Groom's family
25.   Formal shot of Bride and Groom with the Bride's family
26.   Bride's extended family
27.   Groom's extended family
28.   Bride and Groom in front of the church
29.  Bride and Groom doing a dip kiss
Bride & Groom walking
30.   Picture of Bride and Groom walking away into a beautiful life (we were walking down a tree lined road)
31.   Thank you card
32.   Bride with the bridesmaids
33.   Bride with the groomsmen
34.   Groom with groomsmen
Black & White: Groom with Groomsmen
35.   Groom with bridesmaids
Bridal Party Jump Shot- Photographer shouts 1, 2, 3 and everyone jumps on 3!
36.   Bride and Groom with entire bridal party - serious
37.   Bride and Groom with entire bridal party - silly, jumping, etc.


Bridal Party in Church (photographer is standing in the balcony)


38.   Entire bridal party toasting with champagne or drinks
39.   The bride having her dress bustled
40.   Bride and MOH
41.   Parents of Bride and parents of Groom getting introduced
Time to celebrate and drink!!
42.   Each bridesmaids and groomsmen being introduced
43.   The Bride and Groom being introduced
44.   First dance
45.   Father daughter dance
46.   Mother son dance
47.   MOH giving her toast
48.   Best Man giving his toast
49.   Cutting the cake
50.   Feeding cake (or shoving!)
51.   Group shots with your group from High School
(I am so glad we had our photographer take a picture of our swimming friends, little did we know it would be our last time together as a group because our dear friend Chris passed away a year after the wedding) Take a serious and silly picture
'Feeding' each other cake
52.   Group shots with your group from College
53.   Throwing your bouquet or giving it away
54.   The place cards
55.   The gifts (card holder, presents, and party favors)
56.   The reception room before guests arrive (centerpieces)
57.   The guest book (maybe while someone is signing)
58.   Candid shots of cocktail hour
59.   Candid shots of dancing

60.   Send off after the reception

Printable checklist [Right click, save image, paste into a word document, and print]


Wednesday, January 1, 2014

7 Beauty Tips for the Bride

Tip # 1: Get a spray tan 3-4 days before the wedding day.
I had a lady come to my house. She had a spray tan tent and it only cost 40$. A spray tan is a good way to go if you aren't a fan of tanning beds/booths.  If you are getting married in the summer and think I will just lay out the week of the wedding! Guess what, it won't happen (not being a debby downer, just realistic. It will either rain, be cloudy or you will be busy doing last minute things for the big day!) A spray tan won't take care of major tan lines, but it will even out a tiny tan line (I got a sun burn in 3 months before the wedding and still had a light line from my bathing suit) 
It gave me a bridal glow!

Tip # 2:  Wear a button down shirt when you are getting ready so your hair and makeup don't get messed up when you go to put your wedding dress on.
Button down shirt getting ready is a must!

Tip # 3: Apply waterproof mascara over your other mascara so when you cry your makeup doesn't run.

Tip # 4: Buy the lip gloss your makeup artist uses so you can reapply before pictures.
Last minute fixes before walking down the aisle

Tip # 5: Don't wash your hair the day of the wedding. Most stylists recommend you wash your hair the day before.

Tip #6: Carry extra bobby pins in your purse. That way you can quickly fix your hair and get right back to the party.

Tip # 7: Don't forget to put on deodorant! Your nerves will make you sweat a little more than normal, don't be a smelly bride! 
I knew I had applied deodorant after I showered in the morning, but when we got in the limo, I freaked and said "oh my gosh, I don't remember if I put deodorant on after I put my dress on!" Luckily Mandy (Matt's sister and a bridesmaid) said "I have some!" So of course I put it on in the limo, while driving to the church. I think 3 other bridesmaids applied as well; Laughing the whole time!!
 
Don't want sweat stains!

Monday, December 30, 2013

DIY Wooden Letters

I can't tell you how many times my mom and I drove by the church picturing my big day.  Most churches and venues have gorgeous landscaping and aesthetic value, but dressing it up makes it uniquely personalized.  I remember going to a wedding at our church, just to see what the church looks like when a wedding is going on.  We drive up, look at each other and think are we at a funeral or a wedding? Now ask yourself, do you want your guests saying that?
  • You don't need an invitation to go to a church ceremony.  It's a worship service and most churches have an open door policy.  I recommend going to at least 1 wedding at your church to you can figure out how you want to decorate the church. (Please don't use this as advice for every church, check their website, bulletin or ask).  Also, dress up for the occasion, don't wear jeans.  You will stick out like a sore thumb!
DIY Wooden Letters

I bought our initials (2 each for the front and back of the door, that way if the doors are open or closed you can see the letters) (A for Amanda and M for Matt) and 2 inch light blue ribbon at Michaels and borrowed my dad's staple gun for the project. You could also use a hot glue gun to attach the letters to the ribbon.

Step 1: Sand the wood (optional, the wood may be smooth enough to paint)
Step 2: Paint the wooden letters ( I noticed foam brushes worked best )
Step 3: Figure out how long the ribbon should be ( since most churches don't allow nails or pins we draped the ribbon over the top of the door )
Step 4: Cut the ribbon
Step 5: Staple or hot glue the letters to the ribbon
Step 6: Bring the decoration to the church, hang and boom, you have a beautiful personalized church door!
DIY Wooden Letter Decoration

Pre-Wedding Girls Day

     Visiting with out of town guests and extended family on your wedding day can be hard.  It is a busy day. Aside from hugging everyone and thanking them for being there, there isn't much time to 'catch up' with people you haven't seen in 6 months or sometimes more. You struggle with knowing they spent a lot of money and time to be there for you, and knowing you will be busy getting ready, saying vows, getting pictures taken, eating, and dancing. So how do you catch up with these wonderful people you dearly love?

     Luckily weddings aren't just one day, it's a whole weekend. Think about it, there is the day before where you are prepping/decorating, and having the rehearsal dinner.  The day of the wedding you get ready, have the wedding ceremony, wedding reception, and typically an after party at the hotel bar.  Then the day after you have a brunch with all the out of town guests and extended family.

Pew Bows
Decorations at the front of the church
     The day before my wedding we had a girls day. About a month before I emailed my mom, sister, grandmothers, Matt's mom, his sister, his grandmothers, my aunts, cousins and the bridesmaids, and gave them the plan. I knew they all wouldn't be able to make it, but the important part is that everyone knew what was going on, and they felt included (which was important to me.) Keep in mind to invite close friends that aren't in your wedding, but who are traveling, to events like these.  My good friend Danielle was flying in so I made sure to invite her to lunch and nails. You want people traveling to feel welcome, enjoy their time, and look back and say 'that was a great wedding! I am so glad I went!'

Girl's Day Schedule:

French Manicure
Decorating the church from 9:30am-11:30am


Lunch at 12:00pm


Nails at 1:30pm


Not only did this allow me to spend time with family and friends, but the mani/pedi gave me a chance to relax, which is important on such a busy/exhausting/exhilarating weekend.


Monday, October 21, 2013

Bathroom Basket

Wedding Bathroom Basket

A small element in the grand scheme of things

that can help a grateful guest out in time of need   


Wedding Bathroom Basket

This is another project you can tackle early on and set aside.  It takes about an hour to buy the basket and supplies and about 30 minutes to make the basket look pretty and assemble it.

How to put together a bathroom basket


Step 1: Print your list of needed supplies
  • Tampax Tampons
  • Carefree Pantyliners
  • Hair Elastics
  • Bobby Pins
  • Singer Sewing Kit
  • Safety Pins
  • Spray Deodorant (because no one wants to share a gel or solid)
  • Hair spray
  • Advil
  • Mints/Gum
  •  Dental Floss
  • Tums
  • Clear Nail Polish
  • Lint Roller
  • Lotion
  • Perfume/Body Spray
  • Bandaids
  • Tide to go pen


 Step 2: Take your list to the store (Walmart, Target, Kmart) and buy supplies (keep in mind, if the supplies aren't used up, you will be stuck with them so don't go crazy & try not to spend too much)
Step 3: If you don't have a basket (or 2, depending on how many bathrooms are at the reception) Look at JoAnn Fabrics, Michaels, AC Moore, Tuesday Morning, etc. for baskets. (Again, get something you like because once the wedding is over you can use these somewhere around your house!)
Step 4: If you don't have craft supplies to make the sign for the basket, buy some ribbon, cardstock and craft paper while you are at the store.


Step 5: Type up or write out the saying for the sign
So happy you’re here sharing our special day
But just in case something should go astray:
Please help yourself to the contents within
Band-Aids, hairspray or ibuprofen
Use what you need, and just leave the rest
For it may be useful to some other guest!
Repair the damage that may have been done,
Then hurry back and join in the fun!
Step 6: Jazz up the sign
I printed mine on cardstock and backed it with light blue paper and then on black and white swirly paper.
Step 7: Weave the ribbon through the basket
Step 8: Attach the saying to the ribbon/basket (double stick tape works wonders with projects like this)
Step 9: Assemble the basket with all the supplies.  Take everything out of the plastic and packaging (your guests will be more likely to use them) Place tallest items in the back and try to configure everything so it can all be seen.
Step 10:  Don't forget to bring the bathroom basket to the reception site with you when you set up or to the planner (depends on who sets up)
Tip- If it is a Men/Women's bathroom, you don't need women's body spray and tampons in the men's basket ! ;-)